May 30, 2011

Oatmeal Chocolate Chip Cookies--Egg, Dairy, Nut, Peanut-Free

(I wrote this a few weeks ago...have just gotten around to posting!)

I need a spa day.  I'm not complaining, I'm just stating a fact. 

Tristan had his dance recital today which was the most adorable thing I've ever seen.  But after some long nights sewing dance recital costumes and props, and then a mad morning baking 6 dozen cookies for the bake sale, I'm now officially in recovery mode. 

My little prince!
Which probably means I should be in bed right now, but it looks like Addi might be skipping a much needed nap after being mesmerized by dance after dance...after dance.  And now...Addison starring in her own concert singing a medley direct from her crib! 

Anyway, I wanted to share my recipe for oatmeal chocolate chip cookies before I lost steam.  I added recipe cards to each bag of cookies so that people could read the ingredients and could use or pass along the recipe.  Not sure what people thought of that but I'm sure the words "dairy, egg, nut free" scared some people away. 

I am going to now profess my love for these cookies.  If you like oatmeal chocolate chip, please give them a try.  You won't be disappointed.  I like that the oatmeal adds a bit of texture and makes it a little less sweet (which to me just means you can eat more in one sitting!).

Oatmeal Chocolate Chip Cookies
(Dairy, Egg, Nut Free) Contains: Soy, Wheat

Ingredients:
1 c. vegan margarine (like Earth Balance)             
½ c. sugar                                                                
1 tsp. vanilla extract  
½ tsp. baking soda                                                     
1 ¼ c. flour                                                           
1 tsp. baking powder, 1 T. vinegar (I use balsamic), & 1 T. water, mixed together
1 c. chocolate chips (TJ’s semisweet or Ghiradelli semi-sweet chips) *
1 c. oats (I use Regular Quaker Oats) *

  1. Preheat oven to 375 degrees.
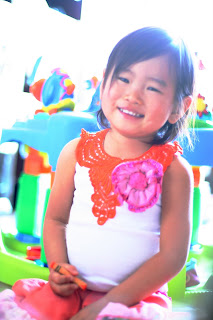
  2. Yes, those are actual tears running down her face.  There were three kids, one bowl, a cranky toddler... :(
  3. Cream together margarine & sugar.   
  4. Add vanilla, baking soda, flour, and baking powder mixture.  Mix well.
  5. Stir in oats.  Stir in chocolate chips.
  6. Drop by rounded teaspoon onto parchment-lined or silpat-lined pan.  Bake for 11 to 13 minutes, or until golden.

Makes about 3 dozen cookies.


* You could play around with these amounts.  I've used as little as 1/2 c. chocolate chips and 3/4 c. oats.  I guess it depends how chocolately and oatey you like your cookies.

May 27, 2011

More granola bars - nut-free, dairy-free, egg-free, and portable!


I found a good granola bar recipe that is nut-free and dairy-free.  And with a simple substitution, it is now egg-free!  Just in time for summer day camp lunches and our first family camping trip with our dairy-allergic, egg-allergic friends, and nut-allergic friends.  This recipe is flexible enough so that you can add in a favorite bar ingredient or sneak in some more healthy stuff for an extra nutritional boost.

Granola bars  
Adapted from PregoCook's Playgroup Granola Bar recipe on AllRecipes.com

2 cups rolled oats (old-fashioned oats are best but quick-cooking works fine, too)
1 cup white whole wheat flour
1/2 cup brown sugar (I use a little less)
1/2 cup wheat bran or wheat germ
3/4 tsp ground cinnamon
2 Tbsp ground flaxseed meal (optional)
1/2 cup honey
1/2 cup canola oil
1 Tbsp ground flaxseed meal + 3 Tbsp water, mixed
2 tsp vanilla extract
2/3 cup of "extras" such as:
  • dried fruit, rehydrated in hot water and chopped into raisin-sized pieces
  • dairy-free semisweet chocolate chips (I use Trader Joe's)
  • unsalted, roasted sunflower seeds
  • up to 1/2 cup sunflower seed butter
  1. Preheat oven to 350 degrees.  Grease or line 13"x9" pan with aluminum foil.
  2. Combine oats, flour, wheat bran, sugar, cinnamon and optional flaxmeal in mixing bowl. 
  3. Make a well in the dry mixture.  Add honey, oil, flaxmeal/water mixture, and vanilla to the well.  Mix dry and wet ingredients until well combined.
  4. Stir in the 2/3 cup of granola "extras".
  5. Spread granola mixture onto 13"x9" baking pan.  Mine didn't completely cover the pan so I shaped mine into about a 11"x9" area.
  6. Bake for about 20 minutes or until lightly browned.  (The original recipe suggested 30-35 minutes for baking.  My first batch was burnt at 25 minutes, and perfect at 20 minutes.  Do start checking at 17 minutes!)
  7. Let cool for 5 minutes.  Cut into bar pieces while the granola is still warm.  If the granola is completely cooled, it hardens.  This makes it really tricky to cut your bars without ending up with broken pieces and a sore forearm. What worked well for me was cutting them but leaving the bars on the pan until they completely cooled.  Then I carefully ran the knife around the cut edges to make sure the bars would easily separate.  They came off the pan just fine.
  8. Store bars in an airtight container. I kept these hearty snacks in the car for those unexpected hunger pains.

May 25, 2011

Red White And Blue Fruit Pops

It's getting hot out there.  The kids are restless.  Summer is a-comin'.  Time to get ready for those Memorial Day celebrations...Need a cool dessert?  And one that's patriotic too?  Make these.  I'm sure you could do these in one day (the layers need about 2 hours to freeze up), but I did this over 3 days...and my kids got 3 different smoothies out of this.

You'll need
Part 1
strawberries (or another red fruit, frozen or fresh)
orange juice - just a splash
Popsicle mold

Part 2
Soy yogurt (plain or vanilla)
soy milk - just a splash
banana

Part 3
blueberries
orange juice


Blend the strawberries with a splash of orange juice.  I used less than 1/4 C of OJ.


Put about 2 tablespoons (or about 1/3 of the way up) of the strawberry puree into each mold.  And put the mold into the freezer for at least 2 hours.  Here's where my kids scored.  I added about a cup of ice to the blender and blended for a super cool smoothie.


The next day, I did the white layer.  Blend together the soy yogurt, a splash of soy milk, and the banana. Again, spoon about 2 tablespoons of the white into the molds and freeze this.  Again, I added some more strawberries to the yogurt mixture and made another smoothie for the kids to enjoy.


Bonus smoothie with the leftover banana soy yogurt mix

On the final day, I made another puree.  This time I used blueberries with a little OJ.  If you can't get your blender to go, add some water or more OJ.  Whiz that up and fill the molds to the top.  Freeze for at least 2 hours.


To help release the pops from the molds, run the mold under warm water for about 10-20 seconds.  They should pop right out!

Enjoy!

He ate them so fast he didn't need that straw feature. :)

Tip:  Make your own frozen fruit.  You know how when you go to the farmer's market and they've got strawberries for sale and you buy the whole darn flat because, hey, they sure do look good....but then there's no way you and your family can eat them all before some of them start going bad.  Or how sometimes the berries look great at the store, but once you get home and open the package up...oops...got some bruised ones.  Well, don't throw them away.  (Throw away the moldy ones, of course) Wash, cut and freeze them for future smoothies!  Nobody will know they weren't "perfect" and blemish-free, once the fruit has been blended into a smoothie.  For peaches and nectarines, I would suggest peeling the fruit and cutting into wedges or cubes.  Lay the fruit in a single layer on a cookie sheet or even a plate.  Just make sure they aren't touching.  Once frozen, pop them off the cookie sheet and into a bag and place them back in the freezer for later.


May 23, 2011

Always be prepared even in familiar situations

We never leave home without the Epi-Pen, Jr. and antihistamine

With a growing number of food allergies (milk, peanuts, almonds, walnut, macadamia, halibut, kiwi) in our family, we don't eat out much.  The risk of cross contamination is just not worth it to me.  We do have a couple of restaurants that we've been to multiple times without incident.  One of them is a Thai restaurant where we've been able to chat with the chef/owner a few times so we feel better about trusting what's in the food.  Despite using crushed peanuts and peanut sauce in some of their most popular dishes, our favorite Thai food had never been a problem.  Until Mother's Day.

We ordered three dishes the kids had eaten before plus a new curry dish for my husband and myself.  (FYI We avoid all nut dishes and deep-fried foods since restaurants might reuse the same oil for allergy-safe and unsafe dishes alike.)  And like always, we spent time explaining to the server, not the owner this time, about our kids' allergies to peanuts, tree nuts, milk products such as milk, butter, and cream.  All the dishes were supposed to be clear of any of the kids' allergens.

Ryken's allergic reaction started a few minutes after we began our soup dish (tom kha gai).  He complained of abdominal pain and the skin around his mouth looked red and irritated.  We immediately recognized these as symptoms he has had in previous allergic reactions.  We asked him if it felt the same as when he needs to go to the bathroom and he told us no.  (Thank goodness he is almost 6 years old now and has developed an awareness of his body functions!)  We asked if his mouth or throat felt like it was getting thicker ("No") or if he felt like throwing up ("I don't know").  We waited a couple more minutes to see if it really wasn't a toilet issue and then decided to give him Benadryl which we carry around in a fanny pack or the car wherever we go.  The medicine seemed to calm Ryken shortly after -- to be honest, he got drowsy really quickly! -- although he still didn't feel completely himself.

In about 15 minutes we quickly chowed down the remaining three dishes since Ryken was half-uncomfortable from the soup, half-loopy from the meds.  All this time, we were checking in with Ryken to see if he felt close to vomiting.  Ryken had a horrific, Exorcist-style vomit incident a couple years back at our neighborhood Japanese restaurant that I never, never wish to happen again.  I took Ryken to the car as my husband waited for the check with Callan.  After another 5 minutes my husband emerged from the restaurant with concern on his face.  He opened the car door and immediately started talking but I wasn't listening.  I could already see that Callan was having an allergic reaction, too.  His left eye was swollen like a boxer and he couldn't keep his hands from rubbing at his eyes.  We gave him Benadryl immediately.  I asked Callan if his mouth felt itchy or it was getting thick and he said it was okay.  He had no other symptoms except for his swollen eyes and that alone took a full 24 hours plus another dose of medicine to subside.

Because the kids only share one allergen -- milk -- I'm thinking this is the likely culprit.  I haven't had time to go back to the restaurant yet but I definitely plan to let the owner know what happened so I can figure out if it was the server's error, if the chef changed her recipes (as the kids didn't eat any dishes new to them), or if it was likely a case of cross contamination.  In hindsight I probably should have asked to speak directly to the owner/chef to confirm the ingredients and to reemphasize the need for careful cleaning of shared equipment.

There is another possible explanation I had not even considered before: maybe my kids have a new food allergy.  Surfing online, I have read that people with existing peanut or tree nut allergies sometimes have a coconut allergy, too.  My kids have had flaked coconut and coconut milk on several occasions.  I don't remember there being a problem but were there some telltale signs of allergy I had missed?  We will be seeing the kids' allergist and pediatrician in the near future so I hope to get some more testing done then. 

As troubling as allergic reactions are, once the reactions have subsided I make note of what we can learn from them.  Besides being reminded of the dangers of eating out, the importance of speaking directly with a manager or chef about food allergies, and the necessity of taking our STAT Kids allergy pack (liquid antihistamine, measuring cup, and Epi-Pen, Jr.) wherever we go, we have been given another opportunity to see what kind of reactions Ryken and Callan are capable of having.  Callan, especially, has had a growing number of allergic reactions since December.  And all of his reactions have affected his left eye first and foremost.  Seeing this pattern emerge could help us (and his future teachers) identify an allergic reaction quickly.  His pediatrician had doubted that a previous swollen left eye had been caused by his moderate almond allergy.  She had thought swelling would at least affect both eyes and other parts of his face and body, which made a lot of sense to me.  But apparently not all allergic reactions hit his body so uniformly.
Callan's left eye is still puffy after two rounds of medication.

I am grateful that the kids have not ever had breathing difficulties but I am aware that their symptoms (swollen eyes, hives and rashes, abdominal cramps, vomiting) are indicators of a more serious allergic reaction.  And these reactions can quickly escalate into anaphylaxis.  We are becoming more familiar with their early signs of allergic reaction so, hopefully, we can deal with reactions as soon as possible and know best when to seek additional help.

Update:  I finally found out what caused the kids' reaction.  On a visit back, I explained the reaction to the same person, the owner's teenage daughter, who had served us that Mother's Day evening.  As suspected, the soup was the culprit.  The server was listing the ingredients and mentioned lactose-free milk.  "But that's okay for you, right?"  Um, no.  Not okay...at all!!  It was an innocent mistake but a near costly one.  After this instance I now always insist on having servers show our Select Wisely allergy alert cards to the chef and I make sure to emphasize no cow's milk of any kind. 

May 20, 2011

Product Review: AllerEnergy Bars

Allergy-free but hard as rock
It is impossible to find an energy bar without dairy or any kind of nut in it.  The closest I seem to get to allergy-free is ingredient lists that are free of any allergens...immediately followed by a boldfaced notice that the bar "may contain traces of dairy, peanuts, and tree nuts".  Unfortunately when you have kids with food allergies, a "maybe"doesn't cut it.

I was really excited when I found out about AllerEnergy.  Made with brown rice and fortified with calcium and vitamin C, AllerEnergy Bars do not contain any of the most common allergens (wheat, milk, egg, soy, peanuts, tree nuts, fish, shellfish). In addition, all AllerEnergy products are free of corn, sesame, sunflower, and potato products.

To save more money I used Amazon's Subscribe & Save (had to use my laptop to sign up as it's not accessible from my smart phone).  I eagerly awaited my first box of chocolate chip bars. When it arrived, I immediately broke open a bar in the hopes that my search for a safe and good health bar was finally over.

The bar may be safe but it wasn't perfect.

The bar was a hunk of a piece, about 3/4 of an inch thick.  It was tricky for me to get my mouth around it.  Besides the thickness, the bar was really hard.  I couldn't break the bar without fearing that I'd do some serious damage to my teeth. And after I did manage to break off a chunk with my mouth, I was worried that the hard, sticky rice would either stay glued to the grooves of my molars or rip my fillings out as I tried to grind it down.

I was pretty disappointed after that first bar.  Since I have a box full of them, I've tried out a couple more bars in case the first one was just a bad one out of the bunch.  The second and third bars actually weren't quite as rock-hard but I still can't imagine my kids eating one of these without there being a serious choking hazard because of the bar's thickness and texture.

I'm sad that I can't recommend this product.  Snacks such as Trader Joe's Fiberful Fruit Bars seem to be better investments.  I'll try my hand at making my own energy/protein/granola bars and will report back when I have some winners.

May 18, 2011

No-Bake Sun Butter Energy Bars

With those endless summer days just around the corner and summer camp on my mind, I have started thinking about handy snacks to pack in my son's lunchbox besides the usual fruit.  I personally love granola bars because they can be chalk-full of fiber, protein, and minerals.  They satisfy my hunger cravings in a way that an apple or banana can't.  Plus, I'm such a sucker for the salty-sweet contrast. 

The problem with granola bars for our family, though, is that most kinds in the market contain milk products, peanuts and/or tree nuts.  It seems that homemade granola bars are the best way to go.

I want to make granola bars that held together for all-day outings such as summer camps.  But in my search for a good granola bar recipe I got sidetracked by a simple raw protein bar recipe from Averie's Love Veggies and Yoga blog.  These bars might not be ideal for long trips on hot days but they are so easy to make that I can look past that.  I can save these for in-house snacks. 

This recipe offers a lot of wiggle room for substitutions.  The original recipe calls for peanut butter but I used sunflower seed butter since we are peanut- and tree nut-allergic.  If your kids aren't allergic to almonds or sesame, try almond butter and lots of sesame seeds to give the bars a boost of calcium.


Sun Butter Energy Bars (adapted from Love Veggies and Yoga Blog's Vegan Peanut Butter Chocolate Chip Protein Bars)

1 ripe banana
1 1/2 cups oats (I use quick oats.  If you are gluten-allergic, make sure you use certified gluten-free oats.)
1/2 cup shredded or flaked coconut
1/2 cup raisins (you can probably use any other type of dried fruit)
1/2 cup maple syrup (agave should be fine, too)
1/2 cup sunflower seed butter (any nut or nut-free butter should work depending on your food allergies and personal preferences)
4 Tbsp ground flaxseed meal

1 tsp sesame seeds
1 tsp cinnamon
2 to 4 scoops soy protein powder (optional; I skipped this)
  1. Mashed banana until most or all lumps are gone.  Stir in remaining ingredients until well combined.
  2. Spread mixture on a small baking pan (mine happened to be about 12"x8")
  3. Put pan in freezer until bar has frozen, at least an hour.
  4. Remove pan.  Cut into small bars.  Store in freezer, taking out one at a time when you are ready to eat.
The quest for great on-the-go granola continues.  In the meantime, the no-bake energy bars are perfect for those low-key afternoons at home.

May 16, 2011

Fun, Sun (or lots & lots of fog), and Staying Safe at Summer Camp

When you're an allergy mom, you learn to be prepared.  You learn to be prepared because you know that if you're not, it could mean life or death.  For some, being organized and being prepared comes naturally; while for others (ahem...), life can feel like a blur of diaper changing, piles of dirty laundry, overdue library books, toys spilling out of every crevice of your house--well, you get the picture.

For those of us who find ourselves, shall we say, organizationally challenged, summer camp season will tend to sneak up on us.  This year, we are vowing to start early.  It's May.  We're gonna talk summer...check a few items off the list and you'll feel much better.  I promise.


Meds Inventory
Take an inventory of your child's allergy medications--both prescription and non.  Most insurance plans will only allow you one Epipen per month, so if two or more of yours needs replacing, you should call into your pharmacy today to make sure to get the ball rolling (which reminds me, I need to do a pick-up at Walgreens today...).  They might have similar restrictions for asthma inhalers (sorry, I'm not as knowledgeable on this).  If they'll allow it, you'll need at least two sets of meds for camp--one in his backpack as well as a set with the camp administration. 

Stock up 
Don't forget about any environmental allergies your child may have, especially if he'll be spending a lot of time outdoors--symptoms may manifest themselves much more fervently than they did when your child was sitting inside a classroom for most of the day.  Stock up on any meds he might need for prevention or relief.   
By the way, since the Benadryl recall I have not been able to find any of it in melt tab or tablet form for kids (or even those squirting travel pack thingies).  Just yesterday, I noticed a generic version in a kids grape melt tab at Target and picked up a stash.  Ask your doctor about it if you're unsure.  And if you do add these to his medication bag, you'll need to list them on your Food Allergy Action Plan.

FAAP
My what?  Your Food Allergy Action PlanFood Allergy and Anaphylaxis Network (FAAN) has a link on their site that enables you to easily print out the form in one of 8 languages.  Print it out, fill it out, and attach a recent picture of your child to it.  Make copies so you won't have to fill it out over and over again.  Better yet, if you are due for an appointment with your allergist (or if you end up making an appointment just to touch base--probably a good idea), you can bring in a blank form and have the doctor answer any questions you have about the form.  Have the doctor sign and date it so you can use it all summer.  While you're at your allergist's office, update any prescriptions which have or are about to expire.

Some Q & A
When you're searching for camps suitable for your child, ask each program about its experience with allergy preparedness and experience with food allergies.  Some questions to ask:
1. What food allergy training has your staff received?
2. What is your experience with anaphylaxis/administering Epipens/severe food allergies/asthma, etc?
3. What is your emergency plan for severe allergic reactions?
4. What food is prepared by or given to the participants, and how would you accommodate my child and his food allergies?
5. What is your peanut policy?

Provide Resources
A camp's experience (or non-experience) with allergies doesn't have to be an end-all.  Use your good judgment and instincts.  If you're set on a particular camp that doesn't happen to have much knowledge of food allergies, offer to send them some resources that they can use to help train their staff (more coming soon!).

Allergy Kits
Prepare an allergy emergency kit for the camp to keep while he's in their care, along with another one for his backpack or as a back-up to be kept at home or in your bag.  Tristan's is just a freezer bag with his name and allergies listed on the outside.  Take the Sharpie and label everything inside with his name, too.  The emergency kit should contain: allergy medications as instructed by your child's doctor (including cortisone creams, allergy eye drops, inhaler, epipen, etc.) and a copy of your child's Food Allergy Action Plan I also keep sunscreen in his pack for those three or four days the sun manages to push through the summer fog.  Get into the habit now of applying the sunscreen every morning before school if you haven't already, and show him how to apply it himself so he'll be able to reapply when you're not around.  If he has really sensitive skin, teach him to use only his sunscreen (For Tristan, random sunscreen + sweat = skin rash/eczema flare-up).

Personal Letter
Start drafting a letter to present to the camps about your child's allergies.  Don't freak out about doing this.  It's your chance to tell your side of the story, and personalize your child's allergies.  We will post some examples to help you get started soon!

First Impressions
On the first day of camp, bring in another copy of your child's Food Allergy Action Plan, his allergy emergency kit(s), and the personal letter detailing your child's experience with allergies.  Make sure to introduce your child to each teacher or caretaker so that they can identify him, and so that he can recognize them if he needs to ask for help.  Show the staff how to identify his allergies on his allergy bracelet/necklace--it's a helpful and quick reference until they've learned all his allergies.

Be a Chatterbox
Keep an open dialogue with the staff and insist that they keep you informed of any allergic reactions or allergy-related issues they may be concerned of.  If cooking lessons or snacks worry you, gather information about ingredients in advance so you'll know whether you need to provide alternate snacks or have him pass on the cooking this time (I know, sad...but better safe than sorry.  Logan came home once with an eyelid almost swollen shut after a cooking lesson that used eggs).

Teach Your Kid
Continue educating your child about keeping herself safe from allergic reactions--not sharing food, identifying allergens, washing hands before and after eating, etc.  

Stay positive and know that you are being a fabulous mom by providing your children with the opportunities and memories that will impact their lives in so many ways.  All in the name of love!

May 13, 2011

Restaurant Review: Zest Bakery

Triple berry (right) and strawberry lemonade muffins. No gluten, no dairy... no way!
UPDATE:
After much feedback to its dedicated customers, many of whom are managing food allergies, Zest's offerings are now free of almond milk, which was once a key ingredient in its sweets.  Zest's regular menu items are nut-free with the exception of the winter holidays when it offers pecan pie and specials of the day that might include finishing touches such as almond syrup.  Keeping nuts out of the baking process -- now that's something more to rejoice over!

Gluten-allergic friends, rejoice!

Zest Bakery is a gluten-free restaurant/cafe in San Carlos started by Charissa and Patrick Luke.  It was built and maintained without ever having any gluten products touch its equipment.  This is terrific for gluten-allergic and people with celiac disease as it eliminates the chance of cross-contamination.  The bakery also goes through great lengths to prevent cross-contamination of other allergens including milk and eggs.

The bakery's menu includes breads, muffins, cookies, sandwiches, and boil-at-home packs of ravioli.  In addition to its regular offerings, Zest is always creating new treats using local, seasonal fruits or holidays as inspiration.  In recent weeks orange-glazed donuts, Meyer lemon curd muffins, and chocolate amaretto cupcakes have graced their cooling racks.  Pizza and wedding cakes are on the horizon.  You can keep track of their daily specials and what they are testing out in the kitchen (chocolate-covered matzo with rosemary?) through their Facebook page.
 
Many of Zest's gluten-free goodies are also dairy-free and some are even vegan (dairy-free, egg-free).  The bakery is completely peanut-free and has never used nut flours.  Please note that some tree-nut products are used, including almonds milk in its muffins and most breads, so do ask questions regarding your specific allergies.  I exchanged a few emails with Patrick and he was happy to answer all of my questions. 

I recently tried some Zest muffins, cookies, bread, and ravioli.  I thought the cookies and ravioli were good.  The bread had a drier texture than normal gluten-full bread but was still tasty.  (Is the dryness typical?  As a non-gluten-allergic person, I don't have a lot of experience with gluten-free bread.)  I also tried three of their muffins: the dairy-free strawberry lemonade, triple berry, and apple spice muffins.  At $3 a muffin, I thought they were a good size and a very reasonable price considering this was a bakery-crafted specialty treat.  And the taste?  WOW.  They were terrific muffins -- super moist and rich with flavor.  It's always a great sign when you can't tell what you're missing!

Zest also sells products by the Anticupcake Company, a fledgling company that bakes their gluten-free cheesecakes on Zest's premises using their gluten-free graham cracker crumbs.  Probably super-obvious, but these cakes are *not* dairy-free.

If you are in the peninsula and gluten-free or even dairy-free, I encourage you to check out Zest.  If you are on Yelp and have a smartphone, "check in" at Zest and you'll receive a free cookie with your order!

Zest Bakery is located at 1224 Arroyo Avenue in San Carlos.  Their phone number is (650) 241-9378.


May 11, 2011

How Did You Know?

Sarah's note: Jenn is a friend I've known since high school.  She grew up in the Bay Area, but relocated to D.C. where she lives with her husband and two (incredibly cute!) children, Bailey & Rowan.

Both of my children have food allergies. One of the questions I'm asked most frequently is: How did you know they have allergies?

When our daughter, Bailey, was born almost three years ago, we were blessed with a lovely little creature who did all the things a healthy baby was supposed to do: eat, poop, spit up, poop, sleep, poop, and so on... Just a few short weeks into her new life, Bailey began doing something which she shouldn't have been doing quite so often: vomiting.

I was so sad to see my tiny child heaving and bringing up what seemed like a whole meal about once a day. I was afraid to nurse her, which is a terrible fear to have! She was still happy though it all, but the mommy instinct in me knew something was wrong. My sister in law had experience with food allergies and suggested that we should look into that.

I scoured the internet for more information and still felt unsure. Bailey didn't have bloody stool, nor was she having any problems gaining weight and growing. However, along with the vomit, she did have eczema on her cheeks. Our pediatrician also wasn't convinced and thought the eczema could have resulted from the severe east coast winter weather. She said it wouldn't hurt to try limiting my diet anyway, and my sister in law suggested that I keep a food diary and track Bailey's reactions to nursing based on that diary. I just couldn't wait that long and decided to put myself on an elimination diet. Basically, I cut all egg, dairy, wheat and soy from my diet. This is extreme, as it would have been easier to just cut one thing at a time to see what was the culprit, but I felt that I needed to help my precious child fast!

I read a few articles that allergens are NOT passed from a mother to her child through her milk - articles written by pediatricians, not JoeSchmoedia - but I felt that I needed to at least try anyway, regardless of experts' opinions. Immediately the vomiting stopped. Success! Joy!

When we finally got her tested by an allergist after she turned one (they wouldn't take her any younger than that), we confirmed by both skin pricks and blood tests that Bailey was indeed allergic to egg, dairy, wheat and soy. We had her tested again after she turned two, and we were happy to find that she had outgrown all of those allergies. However, we found that she did not outgrow her peanut allergy. We were prescribed an EpiPen and sent on our way. After avoiding all those other ingredients for two years, dealing with a "mere" peanut allergy felt like it would be a breeze. We were also tackling our next allergy challenge at this point: little brother Rowan.


While pregnant with Rowan - even before he was born - I tried to avoid the foods Bailey was allergic to in hopes that Ro would then not suffer from the same allergies. My sister-in-law did the same thing with her second child, and she was successful in her endeavors.

We approached Rowan's diet cautiously but hopefully. He also suffered from dry skin patches on his cheeks, but that was once again during the winter. I thought I noticed a correlation between my diet and his skin, but I also thought I might have been imagining things. We were happy because he was a healthy, joyful boy. But then we switched to formula, and some problems began. His dry skin got worse, and then he got sick. It seemed to be the basic winter cold, but his runny nose and hacking cough lasted over a month. And he got periodic mucus in his stool, which is a sign of allergies.

That's when I remembered something I learned about hypoallergenic baby formula (more to come on this in a later post), and I switched from powered formula to ready-to-feed. Soon after that, he got over his "cold" and has been healthy and happy since. What I've learned is that I should always listen to the mommy instinct in me. If something doesn't feel quite right, that's probably because it isn't. The good news is, we all have support from groups like this one to help us get through it all.

May 9, 2011

Lunch idea: Veggie Pita Pockets

HAPPY FOOD ALLERGY AWARENESS WEEK!  In honor of this week, try a new allergy-friendly recipe that can be used for parties, play dates, or an extra special lunch packed with your favorite vegetables:

And so the challenge of getting kids to eat their veggies continues...

Inspiration came from discovering the pita pockets at Trader Joe’s, and realizing that the kind of dry, crusty pita bread I remembered from childhood were no longer.  These were really soft with a little chewiness, and the sesame seeds added a bit of nuttiness (without the nuts).  Oooh…I feel a veggie moment coming on…

I had also picked up  Tofutti Sour Supreme (Better than Sour Cream) at Thom’s on Geary Blvd. in San Francisco.  I thought I’d give it a try.

We made these veggie pita pockets for lunch--and the results?  Addison’s fell apart pretty early on (her two-year-old hands didn’t really understand how to best keep a pita together) so she ended up spooning out the quinoa and eating that.  (She had been stealing the heirloom tomatoes off the cutting board while I was preparing lunch, so I guess she still got her share of veggies).

Logan ate almost two pockets filled to the brim with quinoa and veggies, and commented on how much he liked the sour cream topping.  Yes, he had a pretty big dollop--more like a glob!

When Tristan got home from school, he ate a pocket with his choice as his snack—just onions and bell peppers, no quinoa.  (By the way, I don’t think I’ve ever seen him eat a bell pepper before then.)  Based on pretty decent results, I decided I was definitely going to add this one to my lunch repertoire.

Letting the kids pick their fillers allowed them to take ownership, and eat more!  If you only have healthy options, you’ll all be happy.  Try adding meat, tofu, fish, and substituting in your kids’ favorite veggies.

INGREDIENTS (WARNING: contains WHEAT and SOY)
½ box quinoa (about 1 c. uncooked)--TJ's

2 cups chicken broth

1 T. allergy-safe margarine (we use Earth Balance)

½ onion, sliced into strips

½ bell pepper, sliced into strips

½ avocado, cut into chunks or mashed, or try Irene's guacamole recipe
handful of edamame

tomatoes cut up into bite size pieces (if you get small grape, heirloom, or similar tomatoes, cutting will be minimal)

Tofutti Sour Supreme (If soy-allergic, omit this or use another safe sour cream)

3 pita pockets, sliced in half

1 T. cooking oil

   1. Start by boiling the chicken broth and margarine.  Add quinoa, reboil, cover and lower heat (very low heat so as not to burn!) to a simmer for about 15 minutes.  Check after about 12 minutes and add liquid if needed.
   2. While the quinoa is cooking, cut up all your veggies.
   3. Saute the peppers and onions in a preheated pan with oil on medium heat until soft.
   4. Once everything else is ready, pop the pita bread into the microwave for about 15 seconds to warm.
   5. Let the kids pick their fillers, and enjoy!

We made about 6 pockets, and had leftover veggies to mix with quinoa and eat later--make more veggies and have enough for a full quinoa dish, or a quinoa & veggie soup--just add broth.  Quinoa and veggie salad can be eaten straight out of the fridge--add some crumbly cheese, fresh mozzarella, soy cheese, or other safe cheese...delish!

May 6, 2011

More Mother's Day breakfast ideas

More breakfast ideas to make the mom in your life feel extra special...as she gets some well-deserved extra minutes of beauty rest. 


Yogurt Parfait
Consisting of fruit and cream, a parfait -- which means "perfect" in French -- is one way to present some favorite breakfast players.  Layer fruit, yogurt, and granola in a fancy glass and you've got an elegant treat fit for your queen.  This is easy enough for kids to make although younger chefs will need a little help.  Use plastic glasses if possible.  I didn't and probably shaved a year off my lifespan from worrying about broken wine glasses.

Ingredients

Approximately 1 cup each of berries or sliced fruit of your choice separated into large bowls.  The bowls I used here ended up being too small so there was some spillage.

Safe yogurt -- We use soy for our milk-allergic kids.  You will use approximately one 6-oz container for each parfait you're making.


1-2 cups favorite safe granola or cereal with clusters.  Please remember to double-check ingredient labels for potential allergens and cross-contamination warnings.


Directions:
  1. Starting with some yogurt on the bottom of the glass, alternate between layers of yogurt, granola, and fruit.
  2. You could substitute a favorite healthy cereal.  Just choose one that's not too thick (skip the shredded wheat).  And be sure not to prepare this too far in advance or, just like cereal sitting in a bowl of milk, it will get soggy.


Love you, Mom, but get your own parfait!


Fruit smoothies
Smoothies are long overdue in our house but now that the sun is back in full force, let the blending begin!  

Smoothies are great for non-cooks especially because it's hard to go wrong with them.  A little more of this, a little more of that -- so easy to correct!  Frozen fruit enables you to have smoothies year-round if you don't mind the coldness.  I always feel like my fresh berry smoothies do not turn out as sweet so if I am going the fresh route without a ripe banana, I end up adding a little sweetener.

Garnish with a gift to make the smoothie even sweeter.
Ingredients:
2 cups berries or other fruit - I used frozen blueberries, raspberries, and mango.
1 ripe banana (helps put the "smooth" in your smoothie)
Up to 1 container (6 oz) safe yogurt
1 cup safe milk (I used Soy Dream Original soy milk.)
1 Tbsp ground flaxseed meal
Orange juice
Ice cubes if you are using fresh fruit (no extra ice needed when using frozen fruit)

Directions:
  1. Put milk product, yogurt, flaxmeal, and fruit into blender.  Do not fill your blender more than halfway when you first begin.  You can always add more once the mixture has blended down.
  2. Blend until smooth.  If you're using frozen berries and notice clumping, stop your blender and break apart the frozen chunks with a utensil.  Then continue on to blender bliss!
  3. Taste-test your smoothie.  Add extra fruit, liquid, or yogurt as needed.  
  4. I usually do not add OJ but tried it for this post.  (Yes, I succumbed to the peer pressure of internet recipes!)  The OJ made the smoothie too acidic so I recommend skipping it or adding small amounts.  Other popular smoothie ingredients are agave nectar, rolled oats, peanut butter, and protein powder. 
  5. Not recipe-related but do clean your blender right after you've poured out your smoothie.  It is so much easier to get those bits off when they aren't dried and caked on. 

One final tip for making this perfect:  CLEAN AS YOU WORK.  Nothing will snap your lovely lady out of her pampered mood like a sink full of dishes, which she will presume are waiting for her to wash.

Happy Mother's Day to all you fabulous moms out there and your families without whom motherhood wouldn't be possible!

May 5, 2011

Homemade Flower Cards for Mom--for even the youngest crafters!

So you're skipping the florist this year to avoid any pollen allergies (or for whatever reason), you've made your Tissue Paper Blooms with your older kids (elementary and up), and you have some tissue scraps left.  Your younger set will be so excited to have a craft of their own--just for mom and just as lovely!

Homemade Flower Cards for Mom

Materials:
Cardstock or paper for cards, cut to desired size & folded in half
Tissue paper scraps of various colors
Glue (like Elmer's or Tacky Glue)
Paintbrush
Paper cup
Pencil, crayons

Make sure you have the paintbrush and cup with your materials.  They really help out little hands get the glue where it needs to go.  I forgot about them until after I snapped the pic.


Directions:

1.   Draw an outline of a flower (trace a circle and add petals) or stems with bulbs or circles (small kids will need an adult's or older child's help with this).


2.   Put a little glue in the cup, some water on the brush (just to dilute the glue slightly), and "paint" the glue onto the flower (you might want to have your child paint small sections at a time so the glue doesn't dry up on her). 


3.   Tear or cut tissue paper into a small piece (about 1-2" sides) and scrunch it up with your fingers.  The kids had fun tearing and scrunching!


4.   Fill in your flower outlines with your scrunchies (I told them to press down with one finger and to cover all the white glue).


Have your child dictate a message to you for their mom or grandma, and then he can write his name, trace letters, or, in Addi's case, scribble all over the card in her signature "loops."  Logan was SO proud of his creation! 


I think Addi may have added a snake and a butterfly (?) to her design.  :)


So lovely!  The grandmas and great-grandmas in our lives are gonna love these little works of art!

May 4, 2011

Flowers, For Me? Allergy-friendly Flowers & Tissue Paper Flower Blooms

Ah-choo!

It's not that I don't love flowers, but I do have seasonal allergies, and the sneezing has not passed me by this spring--in fact, it seems to be in full force.  With outside offenders brought in, I may never find relief (this is me in all my itchy-eyed, runny-nosed glory as we speak).

The good news is that there are quite a few beautiful allergy-friendly flowers available for Mother's Day or any day of the year.  The list includes: pollen-free varieties of lilies (or just carefully remove the brown anthers at the ends of the stamens), roses, hydrangea, orchids (just avoid touching them--there is a chance of skin irritation), pansies, violas, impatiens, camelias, azaleas, begonias, daffodil, dahlias, daisies (you need to make sure that both the dahlias and daisies are pollen-free varieties), gladiolas, irises, marigolds, petunias, snapdragons, tulips, violets, and zinnia.

If members of your household are highly allergic, try to avoid flowers like: lilies (intact with pollen), amaranthus, coneflowers, peonies, poppies, and mums.

Better yet...make your own tissue paper flowers!  (You knew that was coming, didn't you?)


We had a blast experimenting with our flowers yesterday.  Tristan, 6, could pretty much manage the project by following my step-by-step instructions, but my 4-year-old had difficulty (don't worry--they'll have their own flower-making project tomorrow!).

Materials:
Colored tissue paper (craft, hobby stores, some stationery stores, chains like Target)
green pipe cleaners or string/yarn/twine
scissors
stapler (optional, but helpful to have around for kids)

Here are the steps, complete with some helpful hints for little hands:

1.   Cut out some colored tissue paper into a rectangle (ratio length:width should be about 4:3, like 8" x 6", but it's not an exact science).  You will need about 5 - 8 same or different colored sheets per flower.  Generally I found that the more you stack, the harder it is to pull apart the layers later on--so stick with 5 sheets for the kids.

2.   Stack them neatly.  For kids, I found it helpful to staple the stack in a few places to help keep them from slipping around.
3.   Fold accordian-style (remember making a paper fan in elementary school?) about every 1 inch and trim at ends.  Either cut off corners to make a rounded or pointed petal shape, or cut some fringe. 


Kids can cut ends of paper before folding, as the layered paper will be too thick for kid scissors to cut through.  


4.  Wrap the end of the pipe cleaner around the middle of the folded strip of paper and continue to twist down the "stem." 


If you only have string available, you'll make a stemless version by tying a piece taut around the center of the strip. 

If you want to hang your flowers, you can tie the end of a longer piece of string or ribbon (more likely dad might own fishing line--perfect!) around the center, leaving the tail for hanging later, or for clustering together several flowers.

5.   This part takes some patience: Fan out the layers, and then peel each layer up, separating from the rest of the pack.  Do this little by little. 


For kids, tell them to peel slowly.  It might help some kids to use just thumb and index finger for a gentler touch.  And don't worry!  Most tears can be hidden or repaired.

6.   Do a little more shaping once all of the layers have been pulled up.  IMPORTANT!  I found that the less handling, the better.  Once the tissue paper is bent and played with too much, it tends to lose its shape and rigidity.  Some kids will love to pull the paper this way and that.  I ended up adding a staple to the base of Tristan's flower to pull the two sides together.  Good as new!

7.   Clean up, saving any usable scraps for your Homemade Flower Cards for Mom.

Look how gorgeous!
A bouquet of three yellow flowers.  I stuck the pipe cleaner stems into a straw, taped a few more straws around the center one, and wrapped it in ribbon.  Fasten with a pin, glue, or double-sided tape.  Geez.  I wish I was wearing something a little more spring-like.  Oh well.
Any of the stemless flowers would be beautiful on their own or clustered together as table centerpieces.  Or, top mom's giftbox with a pretty paper bloom.

I made a huge one 20" x 15" and a baby one with some leftover paper.  Clusters can give a fantastic effect!
The stemmed varieties can be placed in vases (weigh down with little stones if you need to) or made into a bouquet tied with a ribbon.


This is actually my little stemless baby flower.  If you find an opaque vase, you can set these right on top.
I got some additional help from the fine people at Cherish on Clement St. in San Francisco.  They have these DIY cards available free upon request.  I went there to pick up the tissue paper for this project and it just so happened they had some tissue paper flower DIY cards.  Score!


Don't forget about the teachers in your lives--teacher's Appreciation Week is going on now!  So make an extra bouquet and slip it on her desk with a note--she'll be seriously impressed.

We accept hugs, kisses, and spa certificates!  Happy Mother's Day!