Searching for the perfect blustery or wet winters' day craft that doubles as a lovely handmade holiday gift for the grandparents? Try making ornaments out of dough, paint, and glitter!
I tried about three times to make the recipe gluten free using our gluten free playdough recipe (since we still have bags of it from our event)--without success. But I'm sure one of you GF moms knows how...please chime in if you do!
 |
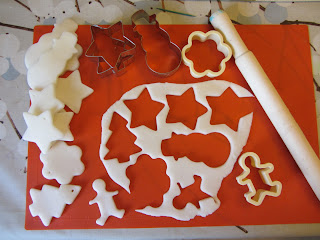
| Look how lovely it all started out! |
 |
| I couldn't get the gluten-free dough to stay flat. :( |
I ended up using a widely distributed
online recipe for dough ornaments. You're going to need time to mix dough, knead (manually or using your mixer), roll out, cut out, bake, cool, paint, and glitter. It is a lot of steps, and I wouldn't suggest completing the craft in one sitting. I ended up making the dough and baking it in the morning, and then decorating ornaments in the afternoon when kids were home from school. They really had a blast, and it was fun to see what they came up with, all so different.
Ornament Dough (contains wheat)
The original recipe states "makes 12", but I got more like 24 pieces out of this recipe.
4 cups all purpose flour
1 cup salt
1 1/2 cups water
cinnamon & nutmeg*
Other supplies:
Rolling pin
Cookie Cutters
Paint (I liked the metallic acryllic paints)
paintbrush
bowl of water
ribbon or twine
toothpick
varnish
glitter*
tray*
(*optional)
 |
| Martha Stewart's glitter collection comes in every color of the rainbow & is proving to be a holiday crafting favorite! |
1. Preheat oven to 300 degrees Fahrenheit.
2. Combine all ingredients, mixing well, and knead for 10 to 20 minutes. We added cinnamon and nutmeg, and it smelled yummy during kneading and baking, but the smell won't last too long.
 |
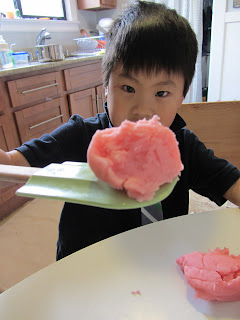
The kids had fun "kneading" the dough, but I ended up puting it in the mixer with the hook attachment for 20 minutes to finish it off.
 |
| I replaced the ornament dough with some GF playdough so the kids wouldn't feel empty-handed while the mixer did its job. |
|
3. Roll out to about 1/4 to 3/8" onto a floured surface, and cut into shapes. Use a toothpick to poke tiny vent holes and a larger hole toward the top for hanging.
4. Bake on parchment or silpat for 30 minutes or more, depending on how thick your pieces are. Ornaments will harden a bit as they cool, but extra baking time shouldn't harm them. Let cool completely on baking racks.
5. Paint (I used acrylic paints), glitter, and let dry. Spray with varnish for shine and preservation. (It seemed to help set the glitter, too, since I didn't use glue.)


No comments:
Post a Comment